Miniature Books by Cheryl Rainfield
Do you love miniature books? Do you love my books and want to make a fun craft? You can create miniature books based on my books with real text from the books (though it’s so small it might not be legible);

just print out the book files from below, then cut and glue them together.
Jump To:

You can also create book jewelry from these mini books. I made a book bracelet (instructions below), and I think it’s so bookish and cute.
(Just please only use it for yourself or give it as a gift, but don’t sell it.)
Jump To: Make The Book Bracelet

You’ll need a colour printer (or a black-and-white printer, then use markers or paint on the covers); glue; scissors or a craft knife; a ruler (preferably with a metal edge), and a paint brush or Q-tip. You may want to use Mod Podge for the cover, but that’s optional.
Free miniature book printables: (right click then “save link as”)
SCARS: MS Word doc or PDF
STAINED: MS Word doc or PDF
HUNTED: MS Word doc or PDF
All 4 books in one page: MS Word doc or PDF
THE LAST DRAGON: MS Word doc or PDF
WALKING BOTH SIDES: MS Word doc or PDF
YOU TOO?: MS Word doc or PDF
DEAR TEEN ME: MS Word doc or PDF
SCHOOLBOOKS & SORCERY: MS Word doc or PDF
All 9 books in 2 pages: MS Word doc or PDF
You have my permission to download, print, and make these for yourself or for friends, but please do not sell them. Thank you.
Quick How To:
Print the book/s you want. Cut cover and paste onto thin cardstock. Cut pages in one long horizontal strip, pages still connected. Accordion fold along lines of pages. Glue white backs of pages together. Glue along spine, insert into cover. Clamp with binder clamp until dry.
Step-By-Step Instructions To Make The Miniature Books:
Step 1: Download and print the mini book/s. Then cut out both the cover and the strip of pages. Cut the joined pages in one long strip.

Step 2: Paste the cover onto thin card stock or thin cardboard. Cut it out and set it aside to dry.

Step 3: Fold the set of pages accordion style along the black lines. I found it easiest to fold the first page, then the top of the next one, lining it up to the first.

Step 4: Glue the white backs to each page directly beside each other. Then press them all together to get them to stick well.

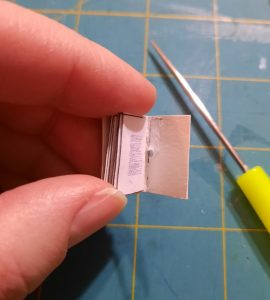
Turn them back over. It should look something like this.

Step 5: Put glue along the spine of the pages, then put it into the cover.

Step 6: Use a binder clip to hold the book together until it’s dry, maybe 10 minutes.

Step 7: (Optional) Add a thin coat of Mod Podge to the covers to give them added durability, a sturdier cover, and a sheen. I used gloss, but you could also use matte.

Enjoy your mini books! I think they’re adorable.

Supplies Needed To Make The Book Bracelet:
-Finished mini books (see steps above).
-A ruler and pencil or pen.
-An awl or something to poke a big enough hole through the back cover.
-Stretchy bead/jewelry cord. I used Stretch Magic.
-Beads to go between the books, or you could just use double the books.
-Clear mini plastic hair elastics or glue to keep the books together.

To Make The Book Bracelet:
Step 1: Make the mini books. Open the book to the inside back cover, measure the middle next to the spine and back page, and mark it.

Step 2: Gently punch a hole with an awl through the back cover where you marked it. Repeat this for each book you’re adding.
I found it helps to punch it only part way through from the inside of the back cover, then again through the outside of the back cover.
If you want to make a charm bracelet with the books dangling, then you would glue an open eye pin into the inside of the spine, then slide the cord through the metal loop at the top.

Step 3: String the first book onto the stretchy bead/jewelry cord. I used Stretch Magic cord. Place a bead on either side of the book.
I used word beads which I had on hand. I may try other combinations as well. (If I’d had rainbow beads I would have used those.)

Step 4: Repeat for each book, adding beads in between. To keep the beads from sliding into the open books, wrap a clear mini plastic hair tie around the bottom of the book, the kind you can buy at a dollar store. Or could you consider gluing the last page to the back cover, but this would mean the book probably wouldn’t move on the cord.

Step 5: Make sure it fits on your wrist (or whoever you’re making it for). Then tie a very tight knot with the ends. I followed these instructions. Snip off the loose ends, and you’re done!

